Grid adjustment – dual adjustment
This tutorial will help you adjust your grid.
Step 1.
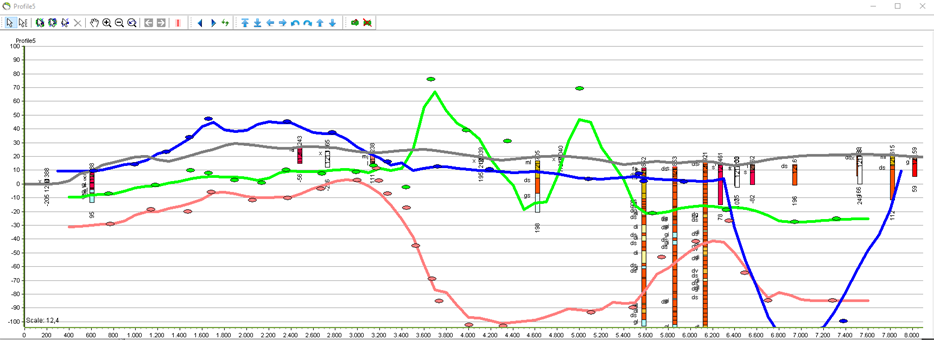
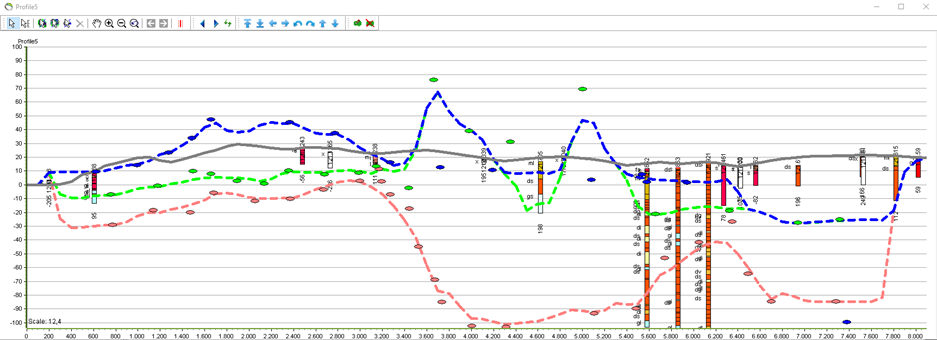
Goal: Blue layer (1) must not be located less than 0,1 m below green layer (2). No layers must cross each other.
1. Grid adjustment setup:
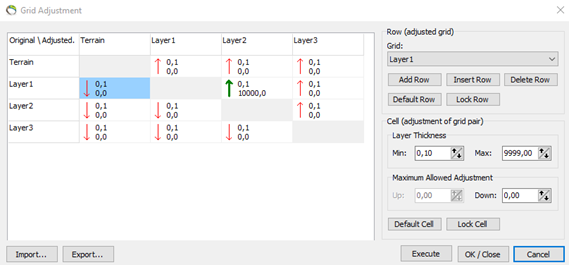
2. Before adjustment:
3. After adjustment:
Step 2.
1. Goal:
Blue layer (1) must be below grey layer (0=terrain).
Green layer (2) must be below adjusted blue layer (1).
Pink layer (3) must be fixed – no adjustments allowed.
2. You’ll have to make another adjustment of the adjusted blue layer. As the grid adjustment tool can’t import surfaces not interpolated in the current GeoScene3D project, you’ll have to rename the adjusted blue line (layer 1) to the original unadjusted filename (this process cheats the grid adjustment tool). In this case:
Layer1.grd → Layer1_Adjusted.grd
Layer1_Adjusted.grd must be changed to Layer1.grd. Please make a backup-file of the original Layer1.grd (e.g. name it to Layer1_original.grd).
3. Before renaming Layer1_Adjusted to Layer1.grd:
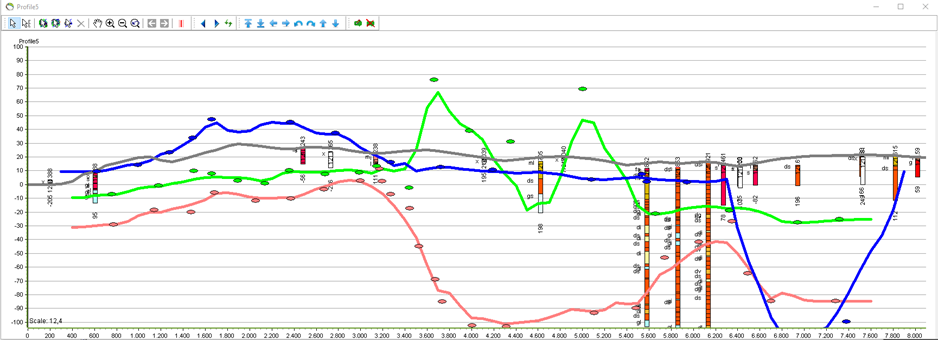
4. After renaming Layer1_Adjusted to Layer1.grd and refreshing layers in GeoScene3D:
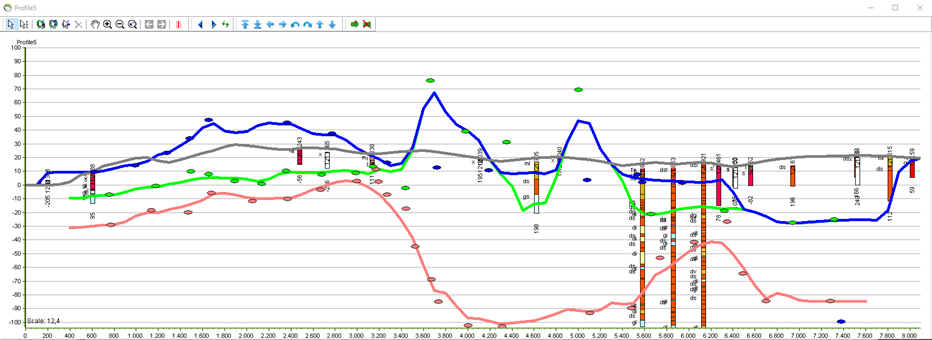
Step 3.
1. Grid adjustment setup.
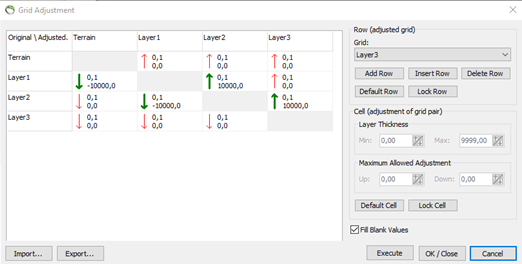
2. Final result – goal has been reached:
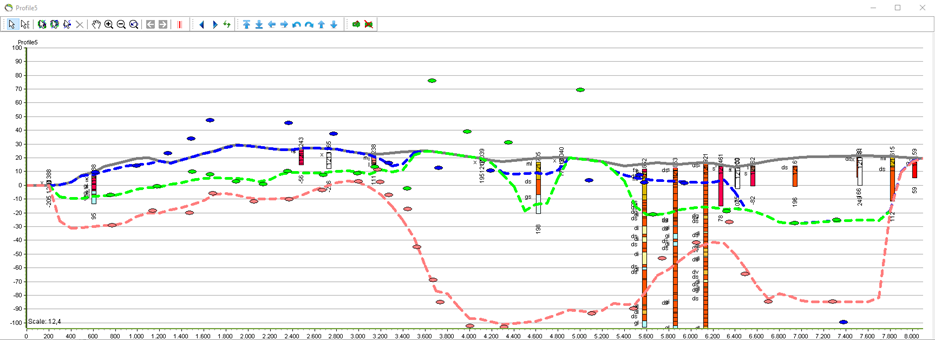
3. Final step – update solid layers.
Original setup is based on setup from “Setup Data for Modelling”-wizard. Se result below:
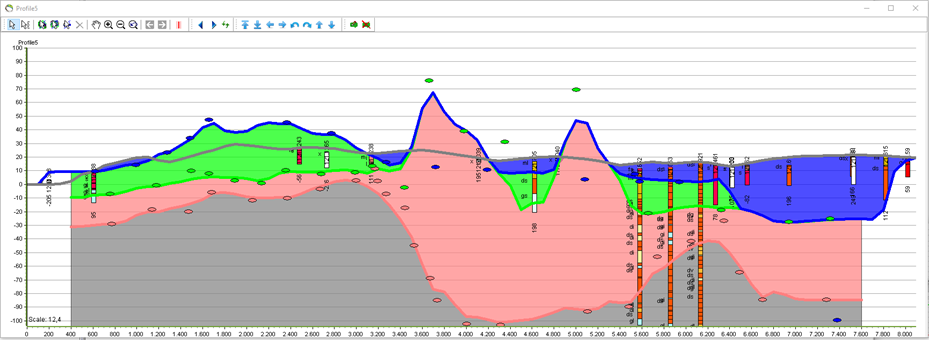
The reference surfaces used to define the solid layers needs to be updated to the adjusted layers. The result is seen below:
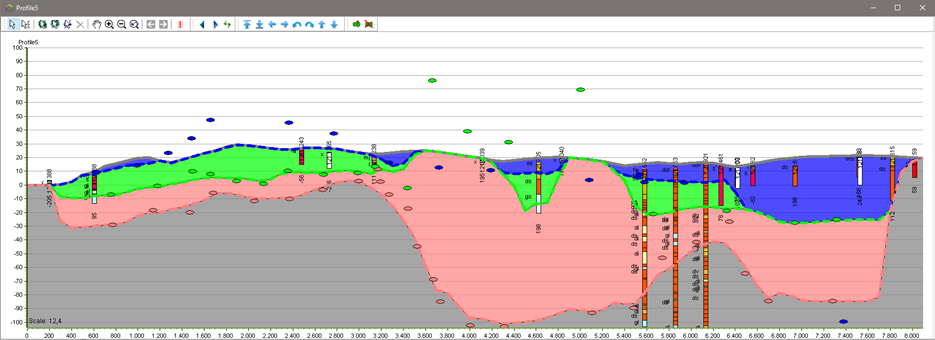
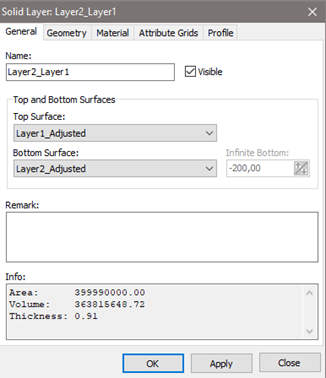
4. Change of solid layer definitions can be found in the property box for the solid layers:
