This is an old revision of the document!
Visualization of Map Layers
This tutorial shows how to visualize different layers to different elevations.
Requirements
- A project with layers.
Step 1. Change layer colors
1. See Add Map Layers
- In the Object Manager you can change the colors of the predefined layers.
2. Object Manager → rightclick “Layer1” → Object Properties → Material → Color….
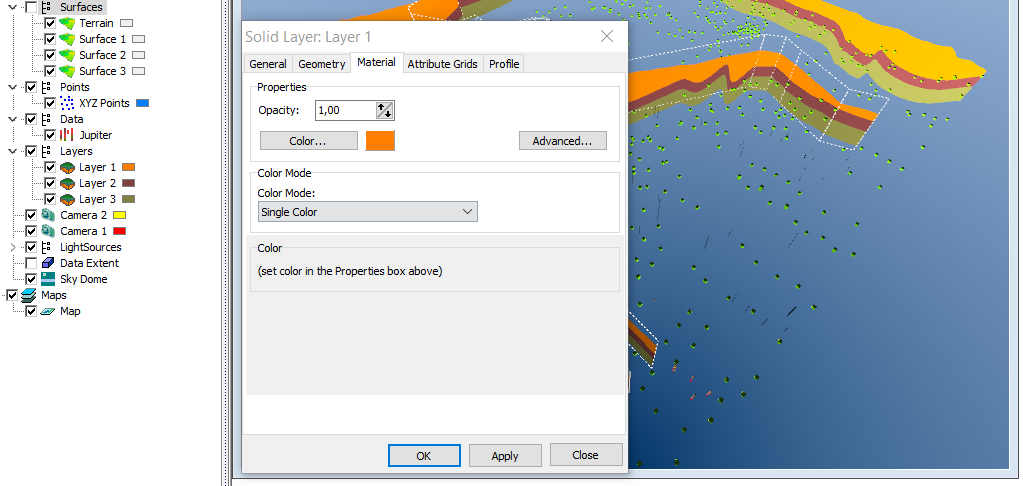
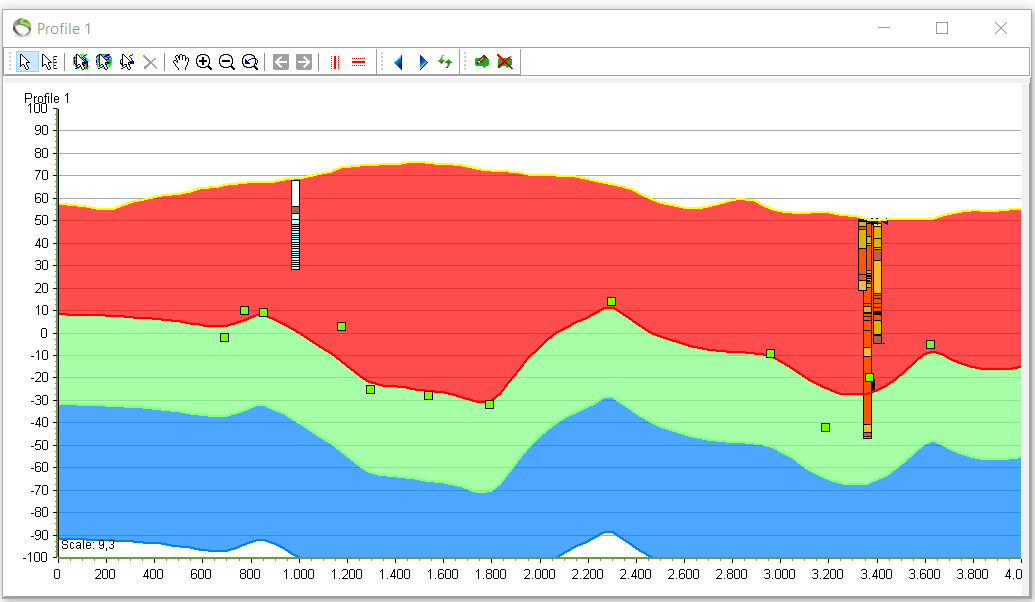
3. Repeat step 1.2. to change color for all layers. Open a profile on the side to see the immediate response to the changes. See picture below for color changes.
Step 2. Visualize different layers on the map
- To gain insight of where the different layers are distributed on a map all the layers need to be imported to the map.
1. Add new map layer  → “GeoScene3D Object Based” → “Layers (Layer Group)” → next and finish.
- See picture below.

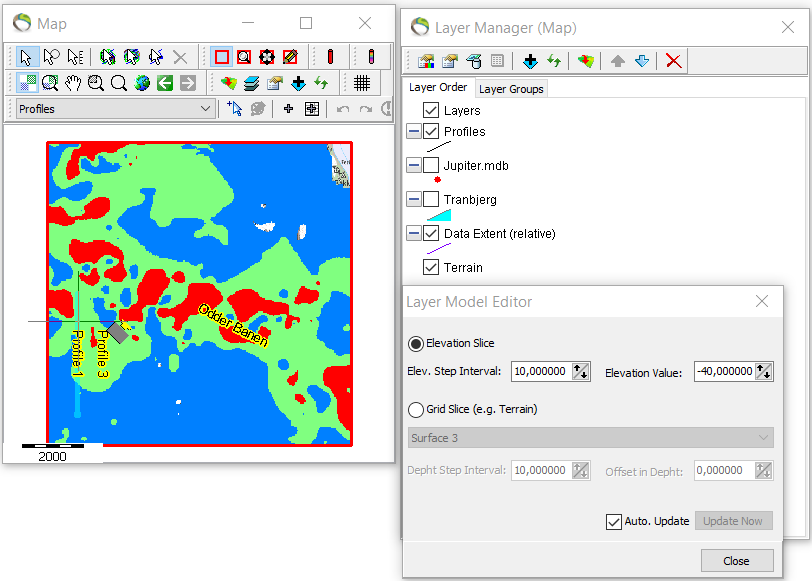
- When the layer properties are open all layers can be visualized to a specific elevation/depth.
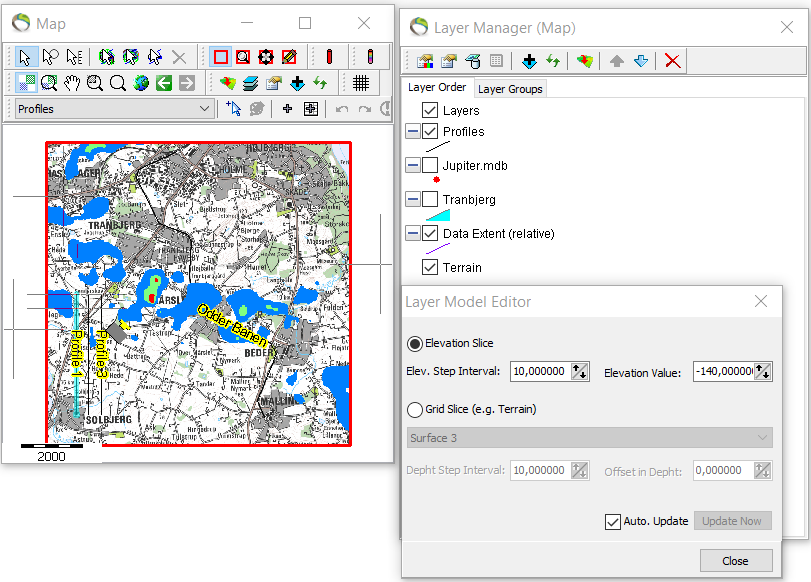
2. “Map properties and layer manager”  → rightclick “layers” → “layer properties”.

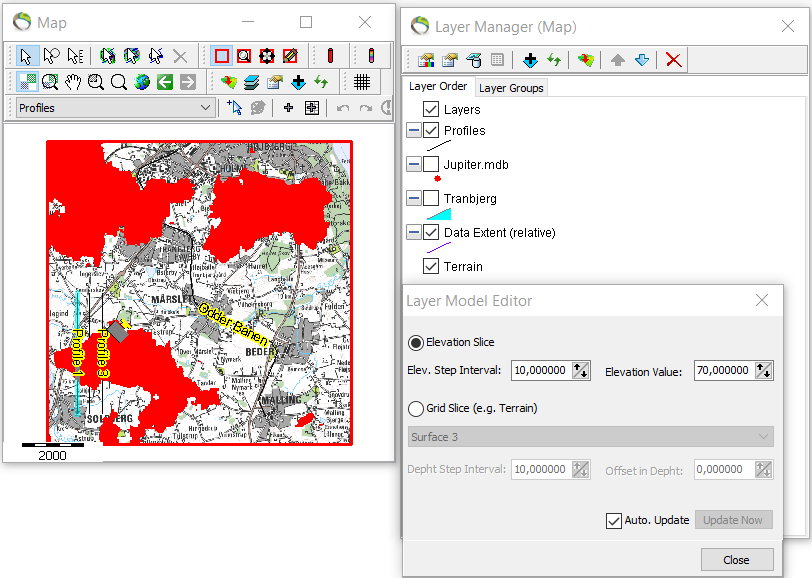
- The default setting in the “Layer Model Editor” to the left is the “Elev. Step Interval: 10,00000” that correlates to a jump up/down with 10 meters.
- The default setting in the “Layer Model Editor” to the right is the “Elevation Value: 0,000000” that correlates to the initial position of the map view.
3. Increase “elevation value” seven times to visualize layers 70 meters above sea level (0 meters).
- Only the top layer “Layer1” is visible to this elvation in different areas on the map.
4. Decrease the elevation value to 40 meters above sea level to have visualization of the next layer “Layer2”.

- Further decrease of the elevation value to -40 meters under sea level show initial greater exposure of the next layer “Layer3” but also presence of the two other layers.
Step 3. Results
- To greater depths at -140 meters “Layer3” is dominant.