Setting Up Data for Modeling
This tutorial will show how to use the “Setup Model Data Wizard”. This is a tutorial for advanced users and detailed instructions on how to add data is not provided for all object types
Requirements
Data
Any problem adding data, help can be found in one of the add data tutorials.
Step 1: Preparations
1. Open any project, e.g, the project you created in the tutorial: Creating a New Project.
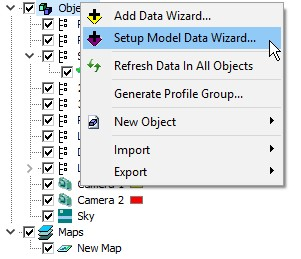
2. Right-click on objects and select the “Setup Model Data Wizard” as illustrated in the below image.
Step 2: Setup Model Data Wizard
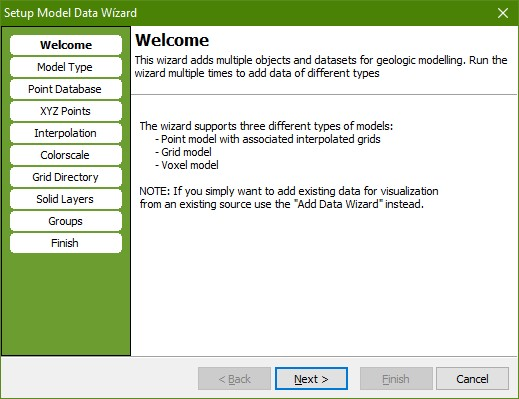
1. The “Setup Model Data Wizard” looks as in the below image. The wizard prepares and adds multiple datasets for modeling.
2. In the “Model Type” page select the “Point and Surface Model”.
3. Check the “Create New XYZ Point Database” radio button and press the “save” button next to the white box.
4. Give the file a name, for example “[path]\SetupModelDataWizard.mdb” file, press “save” and back in the “Model Type” page press “Next”.
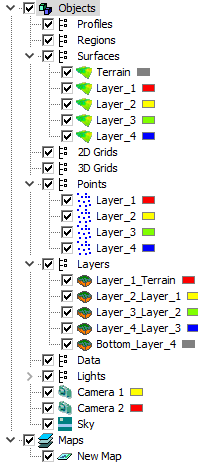
5. In the “XYZ Points” page add 4 new point layers, give them names as Layer_1, Layer_2, Layer_3 and Layer_4 and give them colors as illustrated in below image. Press “next”.
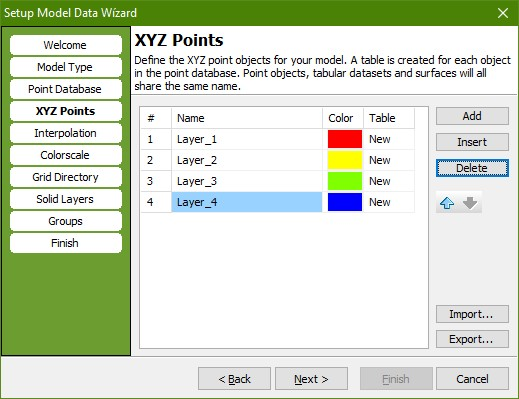
6. In the “Interpolation” page you have to configure the interpolation settings as following:
7. Press the “Configure Interpolation Settings….”.
8. In the “Algorithm” page select the 2D “Inverse Distance Weighting” algorithm.
9. Go to the “Settings” page. Check that the “Exponent” is set to 2.
10. Go to the “Search” page. Set “Radius” to 500 for both X and Y.
11. Go to the “Grid Geometry” page and make sure that the “Node Spacing” is 200 for both x and y.
12. For the “Grid Extent” press the “Scene Extent”.
13. Go to the “Finish” page and press “OK”.
14. Back in the “Interpolation” page press “next”.
15. In the “Colorscale” page press the “Select/Edit Colorscale…” button and select a predefined “Elevation Of Good Conductor (discrete)” colorscale, press “OK” and “next”.
16. In the “Grid Directory” page select the Grid File Output Directory to be C:\Temp and press “next”.
17. In the “Solid Layers” page check the “Create Solid Layers” box, the “Create Top Layer Using Terrain As Top” box, the “Create Infinite Bottom Layer” box. Define the surface as Layer Bottom and press “next.
18. In the “Groups” page leave the names as default and press “next”.
19. In the “Finish” page there is a summary of the above operations, press “finish”. </typo>

