This is an old revision of the document!
Visualization of map layers
This tutorial shows how to visualize different layers to different elevations.
Requirements
- A project with many layers
Step 1. Change layer colors
1. See Add Map Layers
- In the object manager you can change the colors of the predefined layers.
2. Object manger –> rightclick “Layer1” –> object properties –> material –> color….
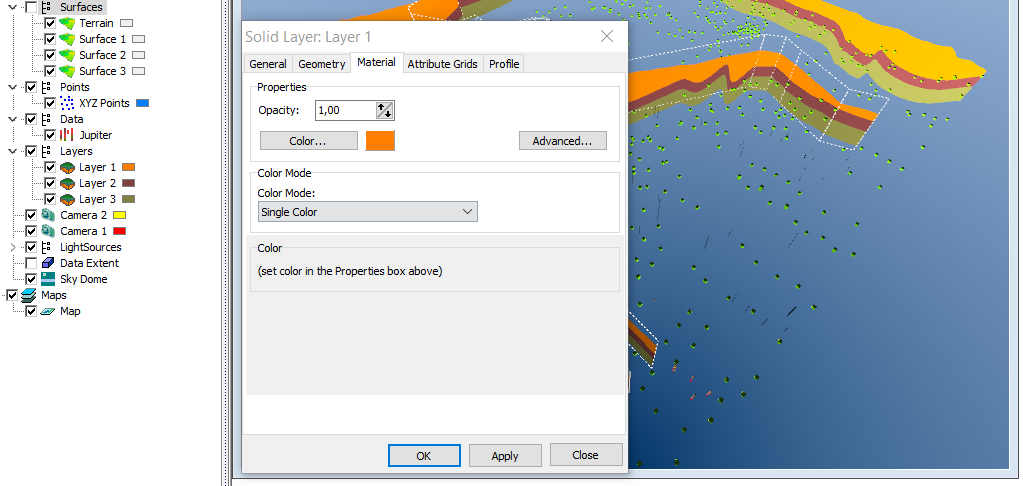
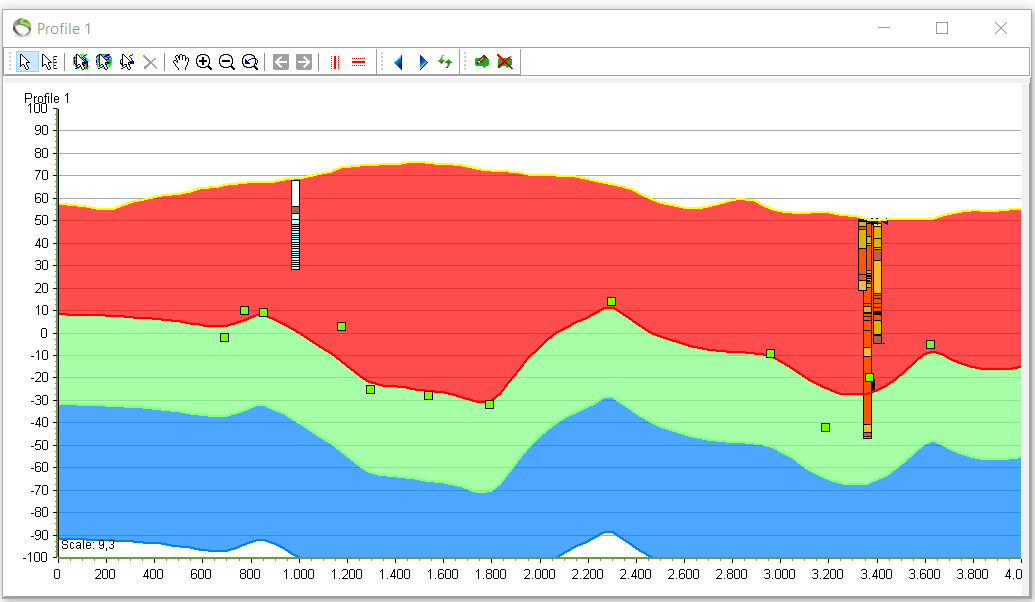
3. Repeat step 1.2. to change color for all layers. Open a profile on the side to see the immediate response to the changes. See picture below for color changes.
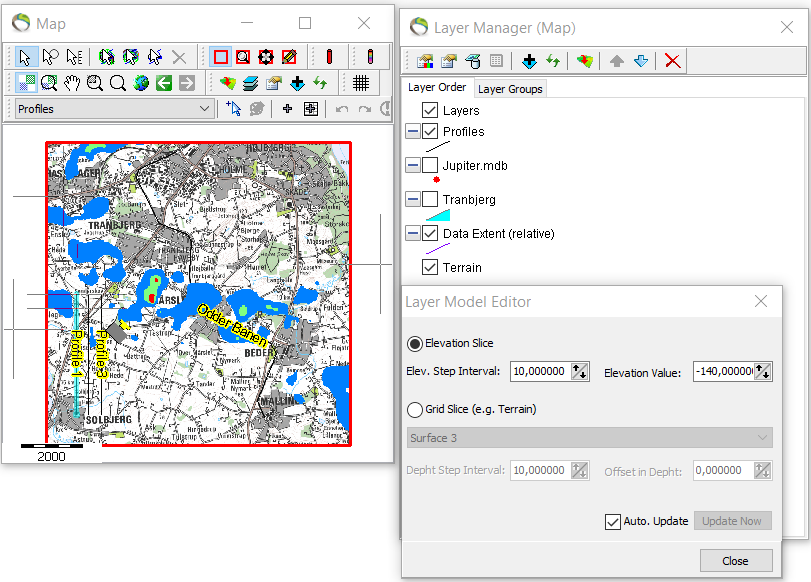
Step 2. Visualize different layers on the map
- To gain insight of where the different layers are distributed on a map all the layers need to be imported to the map.
1. Add new map layer  –> “GeoScene3D Object Based” –> “Layers (Layer Group)” –> next and finish.
- See picture below.

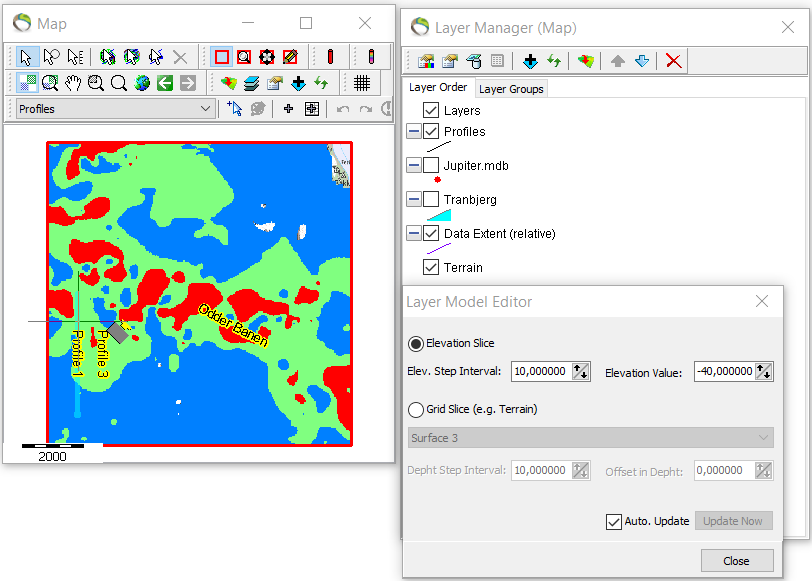
2. “Map properties and layer manager” –> rightclick “layers” –> “layer properties”.

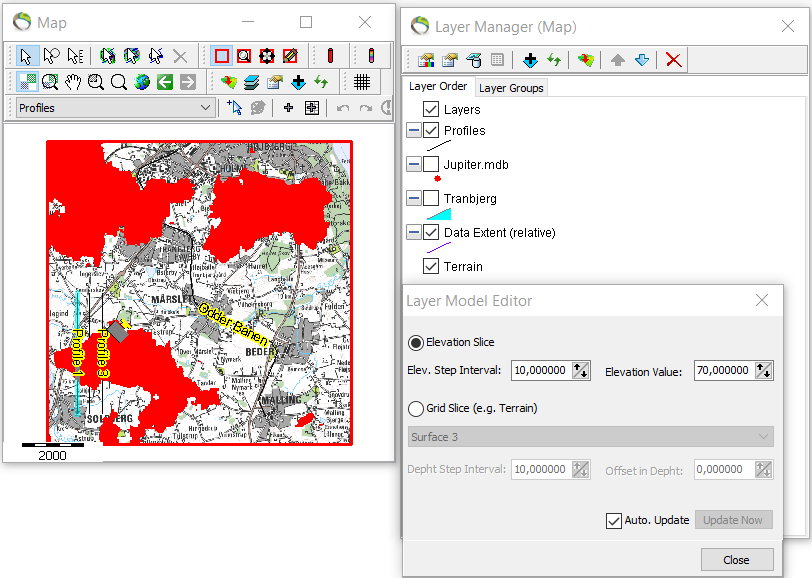
- The default setting in the “Layer Model Editor” to the left is the “Elev. Step Interval: 10,00000” that correlates to a jump up/down with 10 meters.
- The default setting in the “Layer Model Editor” to the right is the “Elevation Value: 0,000000” that correlates to the initial position of the map view.
- layer 2

- layer3