Adding Wells From Files or Tabular Data
This tutorial describes how to use import well data from various tabular (simple column) data sources like a comma separated file (CSV), tabular data, a view in a database (Access, Firebird, SQL Server, Oracle) etc. The tutorial starts with a small introduction of well data in the program, and then explains how to use the “Add Data Wizard” to import your well data.
Requirements
Data
Background: Well data in GeoScene3D
Layer Data: Well Key, Layer Index, X, Y, Elevation, Top Depth, Bottom Depth, Symbol
Water Levels: Well Key, (Water Level Index), Water Level, (Time of Measurement), (X), (Y)
Filters: Well Key, Filter Index, Top Depth, Bottom Depth, (X), (Y)
Inclinations: Well Key, Direction, Angle, (X), (Y)
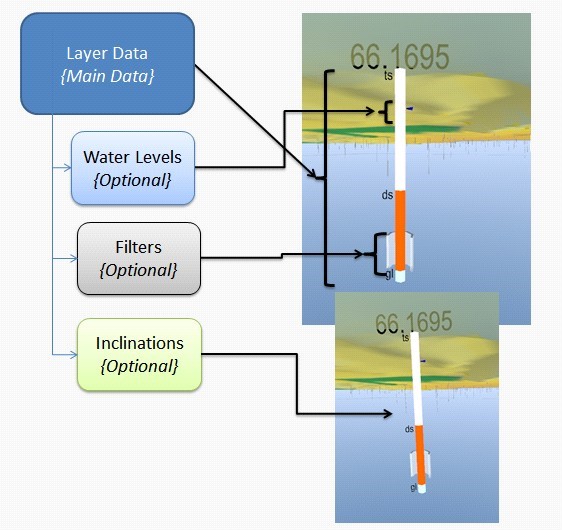
Figure 1. Table data and the definitions of columns. Values in () are optional. Only the ”Layer Data” table is mandatory.
In GeoScene3D it is possible to link to data sources in many different formats which in combination constitute a dataset. Figure 1 shows the structure of a well dataset. It is comprised of 4 individual tabular data sources. All non-optional data links to the layer data – and position - by the well key. The optional position information in the optional data is used to filter on extent and is useful when handling very large data sets having a very large area, e.g. nation scale data sources.
Layer Data: The primary and mandatory data set. It holds definitions of the position of the well data and the individual layers and a key to be used in a legend symbol to color and identify the layer type.
Water Levels: Optional data. Holds information on water level.
Filters: Optional data. Holds information on filters in the well.
Inclinations: Optional data. Well inclination. Compass direction and inclination angle.
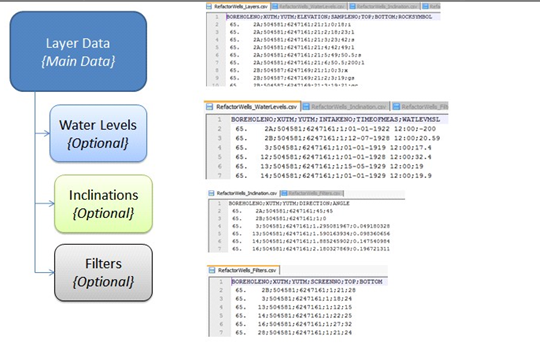
Figure 2. Tabular sources from comma separated (CSV) files.
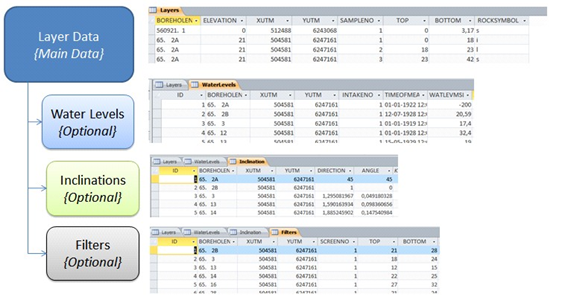
Figure 3. Tabular data source, here from an Access Database.
Only “Layer Data” is mandatory, the other data sources are optional. The underlying data sources can be e.g. simple CSV files as shown in Figure 2. It can also be a set of tables, or even views, in a database, as shown in Figure 3. The sources can be combined as you please, importing e.g. Layer Data from a table in a database and inclinations from a CSV file.
Step 1. Workflow In GeoScene3D
1. Startup the “Add Data Wizard” by selecting the menu in “Manager” and select ”Add Data Wizard”, or pressing the speed button  . Step through the wizard, and links to external sources, a well data set and a 3D well object will be created automatically.
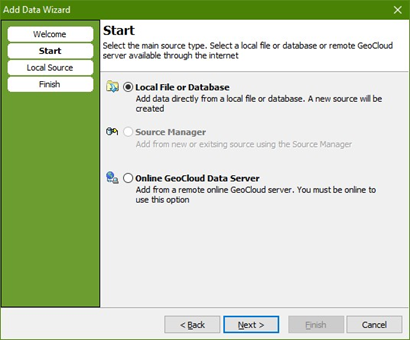
2. Select “Local File or Database”. Press “Next”.
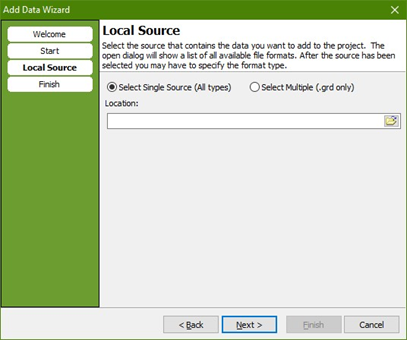
3. Browse for the ”Layer Data” data source on your hard drive or network. Depending on the type of file you select, the window will change according to data type. If selecting a file you are presented with step 3A-5A.
If selecting a database, e.g. an Access or firebird database, you are presented with step 3B-4B.
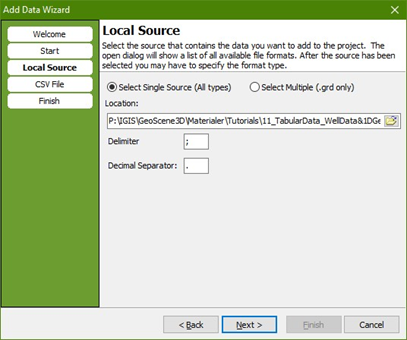
3A. File selected. Setup the decimal separator and the column delimiter. Press “Next”.
4A. Select “Well Data”. Press “Next”.
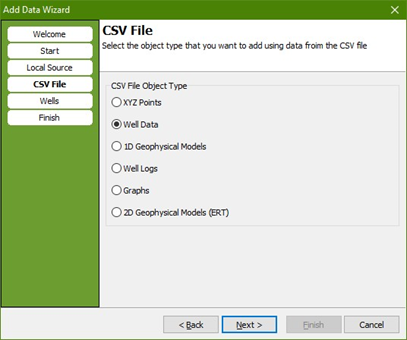
5A. Setup the columns to be used. Press the ”Assign Fields” Button to access the column editor. Also here you add extra information from other data sources for Filters, Water Levels and Inclinations of the wells. When done press Next. (skip next page in tutorial)
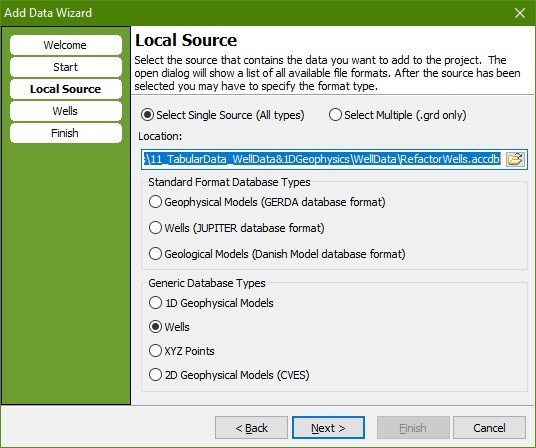
3B. Database selected. Select the type. Here select the Database Type, “Wells”. Press “Next”.
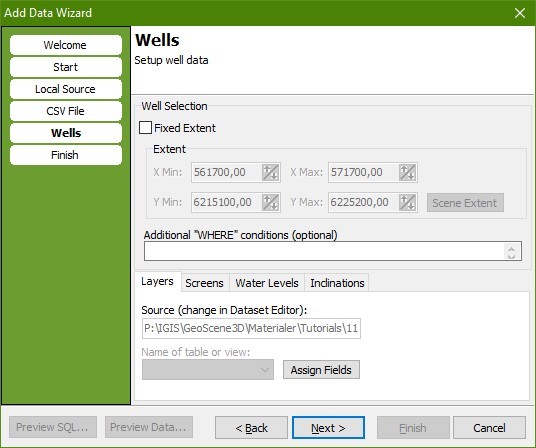
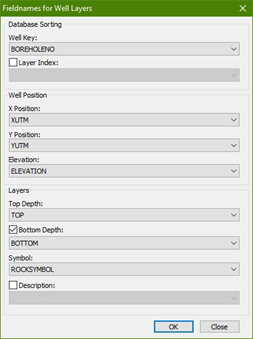
4B: Setup the tables and columns to be used. Select the table – or view – in the drop-down box. Then press the ”Assign Fields” Button to access the column editor. Also here you add extra information from other data sources for Filters, Water Levels and Inclinations of the wells. When done press Next.
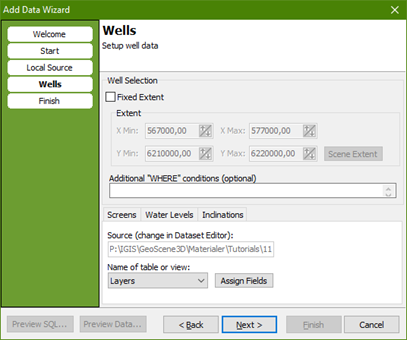
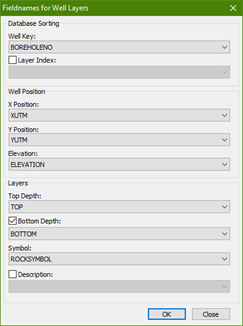
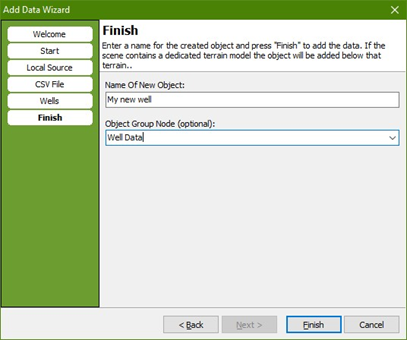
6. Name the object node to be created and optionally select an existing group node or write the name of a new one to place the new well object in.
Step 2. Result
1. A new dataset has now been created in GeoScene3D, along with link to data sources and a new 3D object.
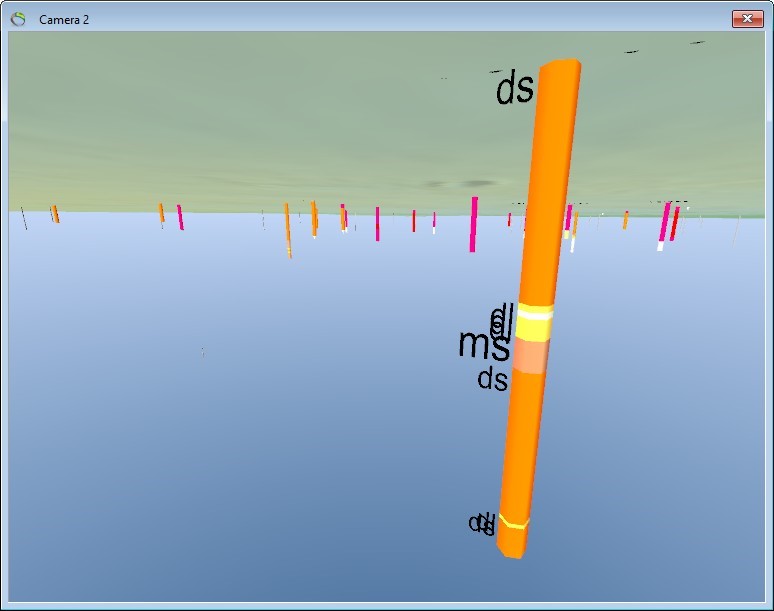
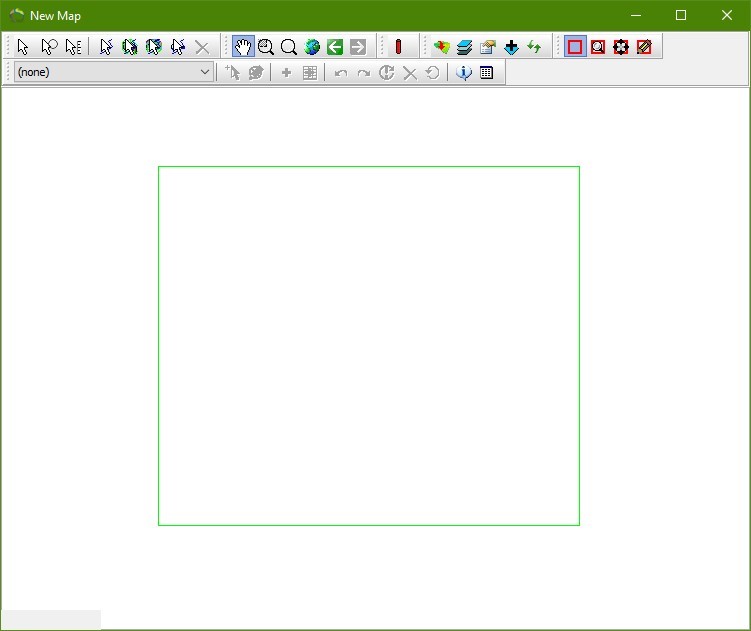
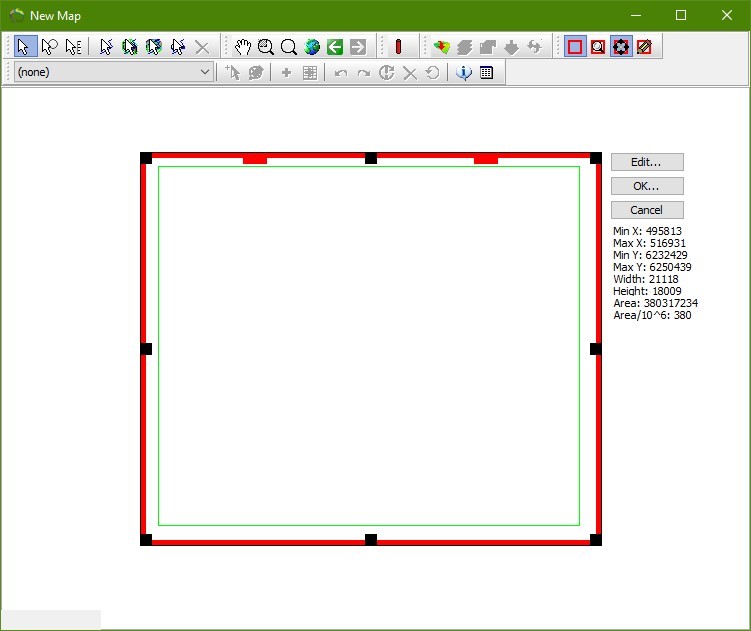
2. If data do not appear in the 3D window, right click on data, “Me New Wells” in the “Object manager’” and choose “Move camera to object position”. To see data on your map, click on “Zoom maps to object source data extent”. Data will be in the light green box. Draw a new Scene Extent around the box to move the scene extent to that area.
