Table of Contents
3D Grid in Map Window
This tutorial shows how to visualize the 3D grid in the map window.
To change the visualization in the 3D window, take a look here: 3D grid in 3D Window
Requirements
- Terrain model grid file or other grid files (.grd)
- A 3D grid - see Add (multiple) 3D grid
Step 1. Add 3D layer to the map
1. “Add new layer”  in the map window and pick the “GeoScene3D object based” layer type → “(3D grid)” → next and finish.
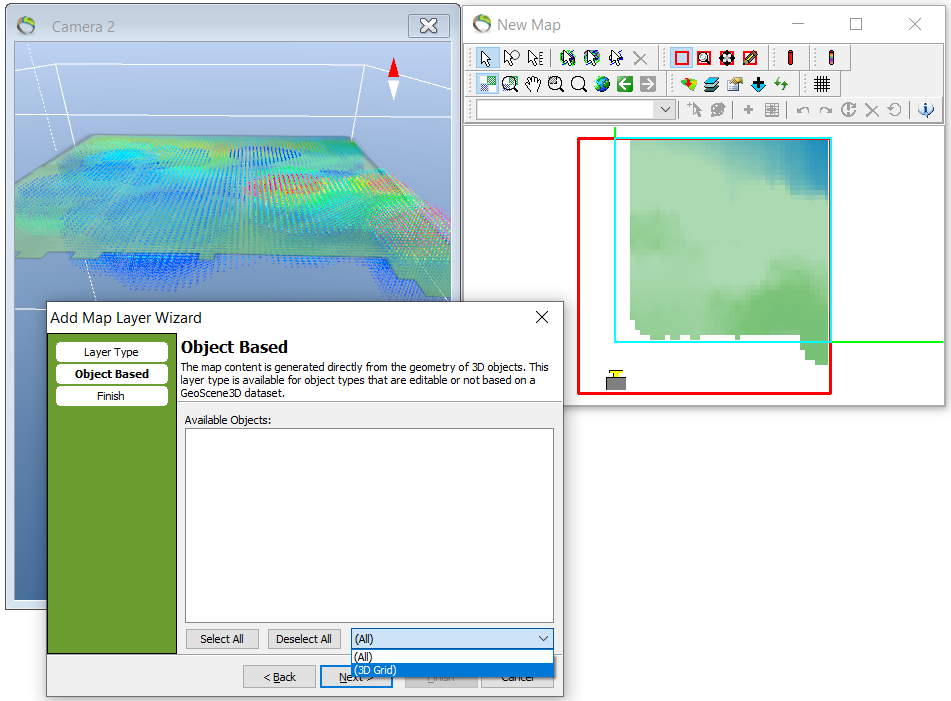
Step 2a. Visualize the 3D grid at a given elevation
1. Open “Map properties and layer manager”  in the Map Window → right click the “AEM 3D grid” → “Layer Properties”
2. In the slice menu the “Elevation Slice” can be edited to the desired index elevation.
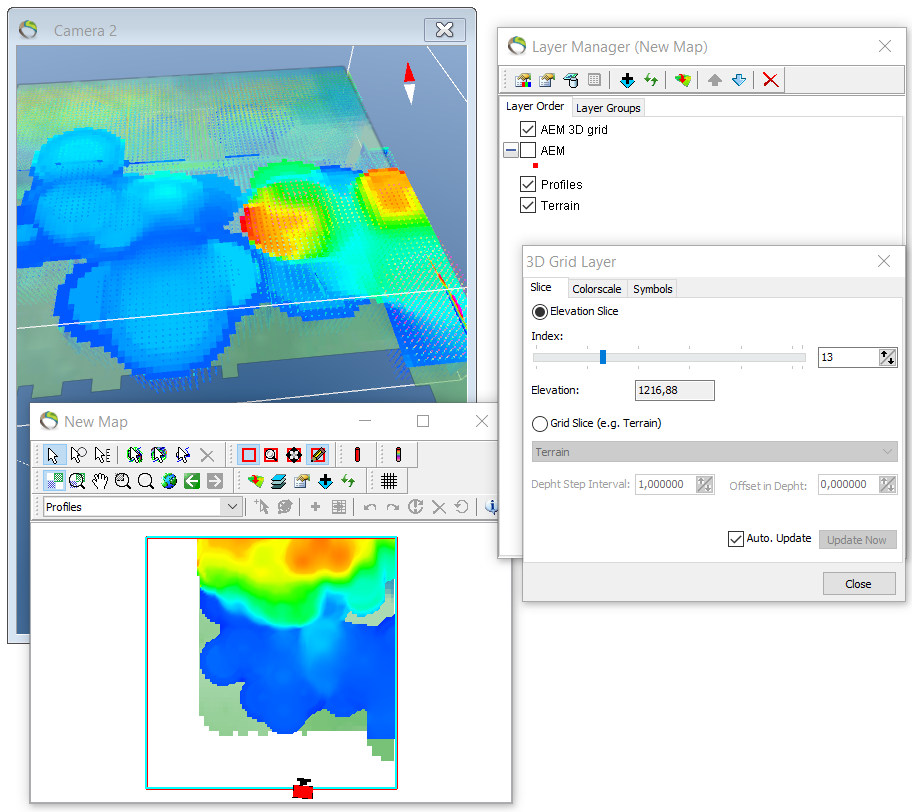
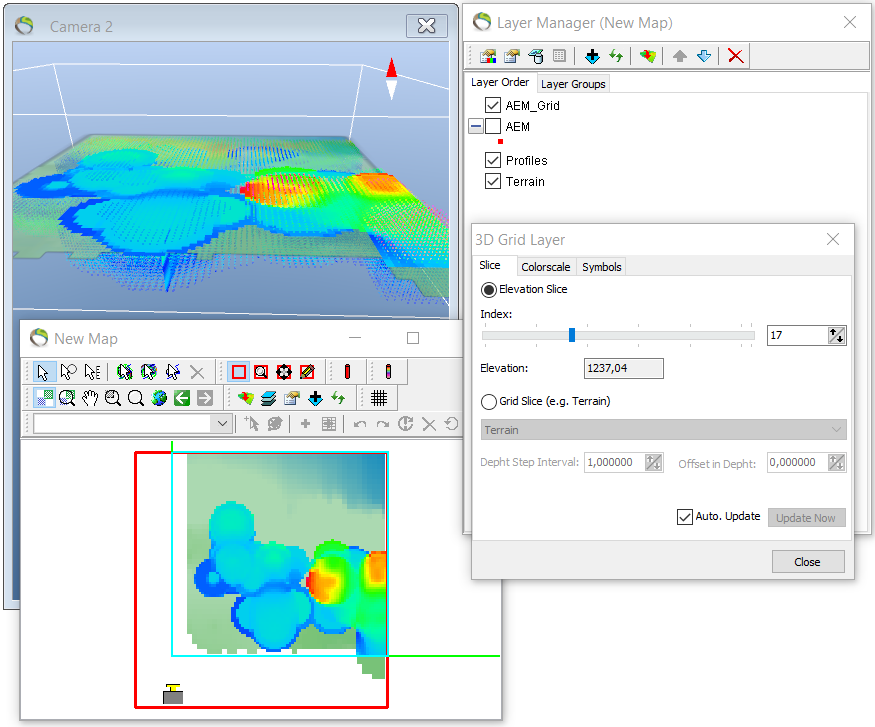
- See next picture for difference in index elevation.
Step 2b. Visualize the 3D grid at a given depth below a surface
- The visualization of the 3D grid can be limited to a specific depth below a surface e.g. terrain.
1. “Map properties and layer manager”  in the Map Window → “AEM 3D grid” → “Layer Properties” → slice → click “grid slice (e.g. terrain)”.
- To the left: standard setting “depth step interval” set to 1 that correlates to a 1 meter jump up/down in the griddata from 0 meter (if meters is defined as the project unit).
- To the right: standard setting “offset in depth” 0 that correlates to data visualization at terrain or surface level.
Example: If you enhance the “depth step interval” e.g. to 2, you are now jumping up/down in the grid depending on your up/down choice in “offset in depth”. Furthermore, if “Auto. Update” is clicked you will see the immediate response to your up/down clicks.
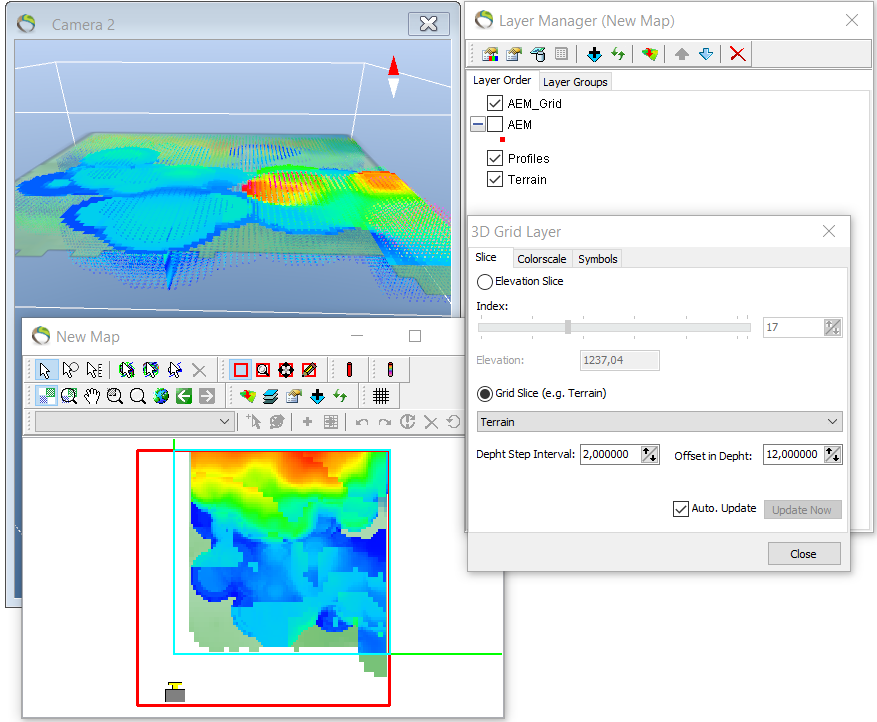
- See next picture for difference in “Offset in Depth”. The offset depth is 16 meter compared to the previous picture with offset depth at 12 meter. This depth is attained by clicking two times on the “Offset in Depth” with the interval setting at 2 meters.
